Sunday, December 8, 2013

Chocolate cheesecake - Yeast free, sugar free, lactose free


This is my new favorite recipe and snack! The best part is that it takes under 10 minutes to whip up. I was inspired by a blog post about the things GAPS dieters do wrong. What did I do wrong? Well I don't drink enough broth or eat enough gelatin. So I went searching for ways to include gelatin in my meals and snacks. Then I found this recipe for a crust-less, no bake cheesecake. Here's my sugar free, chocolate it up version:
 Ingredients:
1 Cup Boiling Water
2 Tablespoons Gelatin (get the good stuff, it's worth it)
16 Drops of Stevia
2 Cups SCD Yogurt
1 Paleo Cacoa Bar

Directions: Stir the Gelatin teaspoons into the cup of boiling water, making sure it's fully dissolved and add your stevia.
 I like this kind of gelatin, it's the real deal, grass-fed beef gelatin. Ellie agrees ;)

Dissolved Gelatin


Allow the gelatin-water-stevia mixture to sit for three minutes.

In the meantime, melt that chocolate. I have worked and worked to figure out how to make chocolate or even carob powder make a descent homemade chocolate with stevia. I failed so many time that I've given up. Recently I found this chocolate bar, which is AWESOME!!! Just a warning it takes several weeks to receive your order and their customer service is lacking, but whatever, if you're patient you get the goods.


Now it's time to add the yogurt. I use my homemade SCD yogurt because of it's lack of lactose. If you aren't into this practice already and store bought stuff doesn't put you in bed, you can strain yogurt from the store or buy cream cheese.

This is the consistency of my yogurt.


Use a hand-blender to slowly blend the yogurt into the liquid.  I blend for about five minutes to make it super creamy. Deep bowls are best for this job!


Now add your melted chocolate into the batter. I then add chopped walnuts to the mix.


I put mine in one cup pyrex bowls and top them with a few more chopped walnuts. Put them in the fridge and within a few hours, voila dessert!!


Saturday, December 7, 2013

Coconut-Flax Muffins/Bread: Yeast-free, lactose free, sugar free, gluten free, starch free

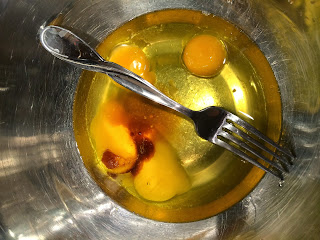
This is another one of those recipes that I've worked on for many months to perfect so that it fits my dietary needs. It's always a great roller coaster to ride to do this, but the outcome is always worth the times you looked at your creation and dumped it in the trash. First let me give credit to my inspiration for this recipe. It's a good recipe on its own if you can eat all the ingredients.

The difficulty came when I needed to cut out the egg whites with the yeast free diet. Here's the egg substitution list that helped me conjure my perfect bread.

Bread/Muffin Ingredient List:
Dry Ingredients:
1 Cup Coconut Flour
1 Cup Ground Flax Seeds
2 Teaspoons Baking Soda
1 Pinch of Salt
Seasonings of Choice**

Wet Ingredients:
1/2 cup melted ghee
1/4 cup filtered water
4 Egg YOLKS Only
2 Teaspoons of Apple Cider Vinegar
2 Teaspoons of Vanilla Extract

Not Wet, but not Dry Ingredient:
1.5 cups Homemade Strained Yogurt

Optional: Walnut pieces

  1. Start melting the the butter
  2. Add all of the dry ingredients to a food processor or your equivalent and mix it up!
  3. Add your seasonings
    1. G's Option #1 Sweet: Cinnamon, Nutmeg, Allspice, Cloves
    2. G's Option #2 Savory: Parsley, Oregano, Garlic Powder
    3.  Turn your oven on to 350 degree
    4. In a separate bowl mix together:
      1. Water, Egg Yolks, Water, ACV, Vanilla Extract
        1. If you are going for sweet 6-16 drops of Stevia Extract (365 Whole Foods Brand)
        2. REMEMBER: If your butter is TOO hot it can cook the eggs!
    5. In the dry food processor, add the yogurt and blend.
      1. My yogurt is homemade and I strain it for several days with a cheescloth so it has a cream cheese texture. It may affect your recipe if you use a thin, watery yogurt. So either make your own SCD yogurt and strain for a couple of days, or buy yogurt from the grocery store and strain it through a cheescloth until you get the appropriate form of the yogurt. 
        Homemade Yogurt Texture
    6. Turn on the food processor and slowly add wet ingredients
      Mixed Ingredients
    7. Blend until smooth texture is acquired
    8. Optionally add your nuts in and pulse!
    9. Here's where you can decide between muffins and bread!
For muffins:
I use paper cups because I don't like to hassle with trying to pop a muffin out of a place its securely fastened to and make a mess and a sad looking muffin.
- I can usually do this directly after blending, but when my yogurt has been more watery I wait a little bit for the butter to harden a bit, this makes them easier to mold into balls.
- Mold the dough into ball and put them in the cups, then flatten the top out with your hand.
This is important for a gluten free/starch free muffin, because otherwise it looks unattractive on the top of the muffin, as well as unevenly cooked
- Cook for 20 minutes on 350 degrees

For Bread:
- I use parchment paper, because, again I dislike failure in the baking department.
- I use a 9 x 13 glass pyrex container.
- Bake for 40 minutes at 350 degrees. 


Monday, July 8, 2013

Almond-Coconut Butter Fudge (Diary Free, GF, Yeast free, Sugar Free!)

So don't hate me, but I flew by the seat of my pants again and didn't measure this experimental- I must-have-chocolate-now-or-someone's-going-down-recipe. I'll guess-ti-mate and hopefully repeat in the future for more exactness.
Chocolate may have to be kicked out soon, but since I don't know and it hasn't caused me any negative symptoms for the last six months, I went for it in my moment of weakness.

INGREDIENTS:
4-5 generous scoops of Coconut Butter (guesstimate)
1/2 cup of unsweetened cocoa powder (I like Ghirardelli)
Stevia to taste (maybe 10 drops for me)
Almond Butter (I buy Artsana) (I'm going to say I used 1/4 cup)
(without the almond butter it was sweeter, so maybe you want to stop before adding the almond butter, or maybe not. We still don't know what's responsible for the hardening)

-Heat the cocoa and the coconut butter in a pan while stirring until the coconut butter melts and mixes with the chocolate
-Add stevia drops to taste
-Add the almond butter and stir

I put it over my SCD/GAPS lactose free yogurt. It made a hardened shell that made me reminisce about that chocolate I used to pour on ice cream that would make that crispy shell:) Well I can do it without sugar, boo-yah!

I'm pretty sure if put in an greased glass jar and put in the fridge this would make a rockin' fudge, but I was WAY to impatient for that.

Enjoy!
G

UPDATE: this did not make me feel good, I think coconut butter for me is like a pure jump into sugar land. Now I'm making fudge/chocolate with carob powder, ghee, coconut oil, stevia, walnuts, and vanilla extract. I'll post that recipe soon.

Sunday, July 7, 2013

How to Make Homemade Almond Milk


Oh Almond Milk! It's so so good. But recently I've learned to make it so much better.  No worries, I'm on a blogging roll, so I'll share ;)

First take your almonds (I just use a bag of blanched almonds, but I'm sure it doesn't matter that much)

1) Soak those puppies:

What to add to the mixture:
a) Almonds (1.3 cups-- in the package I use)
b) Filtered water 'till container is full
c) Grapeseed Extract (I use 10 drops) this reduces the chance for the almonds to grow mold
d) Salt (inhibits bacterial growth)

2) I use my Food Saver and seal the jar and put it in the fridge overnight or 24 hours preferably.

3) When ready to use: Wash the Almonds with new water.

4) Put those almonds in your blender.

5) Add 4 cups of filtered water and a splash of vanilla extract.

6) Blend, blend, blend, blend, blend, blend, blend 'till your ears can't take the blender no more. About 10 minutes or so for perfection.


7) Strain with a cheescloth or nut milk bag (I prefer the latter!); squeeze extra milk out.

You can dehydrate or put the almond bulk in the oven to dry it for use in baked goods. Another option is to keep it in its wet state and use it to thicken gravies. Note that if you are using it for gravies, you need to get on that project, it quickly goes bad.


Simple Green Soup

 I've been GAPS and SCD for years, and I still loathe figuring out how to incorporate broth into my food. This is technically not the Candida diet, because of the red meat (buffalo) and broth is not required on this diet, but it's very soothing to ones stomach.

 I already had this buffalo meat ready to go. I've decided that I'm going to stroll towards this new diet. Stress is my middle name, so in my attempts to become a Type B personality, I shall take my time and do it right. 

My husband buys grass fed beef shanks (cheapest) from Whole Foods every week and makes his dish with it. Well while I was lamenting about my lame ass attempts to incorporate broth into my diet and instead let it rot in the fridge, he offered to not only give me his broth this week but make some onion soup with it.

He made the broth with the shanks in the pressure cooker, then threw onions in and cooked those down. I am using the onion soup as my base. Since I'm to work more and more RAW foods into my diet, my idea is to heat the broth up, just so that it mixes, let it cool to room temp, and then throw in the veggies. I think it worked quite well! Just pretend this is turkey or some other white meat and everybody will be happy :)

Also, I find soups the only tolerable way to eat raw garlic. I use my handy dandy garlic press and it's much more tolerable than popping a raw piece of garlic in your mouth.

Ingredients:
Broth (from your bone and meat of choice)
1 White Onions

Add whatever!
Here's what I added:

Ground Buffalo
Red Bell Peppers
Power greens cut with my herb scissors
Cilantro
Parsley
Garlic
Broccoli ( I actually put this in right away because it was frozen and helped cool down the broth)

Sometimes I add a raw egg yolk to my soups, because it makes them uber delicious, but this was already so delicious I thought I would do without.

The Best Greens!

So I just want to thank my friend Cat for introducing me to Baby Kale. Who knew that you could buy kale that was smaller, less of a hassle to fit in the fridge, and that was triple washed already! Yep, I'm a lazy food nerd, but look what I found, extra time! A triple threat really: Baby Kale, Chard, and Spinach. I just wanted others to know that this exists, if you too loathe soaking Kale in Apple Cider Vinegar and then drying it, and then storing it, and before you can start to cook with it. With a pair of herb scissors, this baby can change your world.

Healthy Sugar-free, Fruit-free Popsicles


Sometimes, the Internet fails you. Could I find one recipe for popsicles that did not contain a fruit or sugar of some sort? NO. So I just made up my own. This is a work in progress, but I'm pretty pleased with my first round. When you bite in at first, you're like, what the hell is this? Then after the third bite, you're feeling pretty proud of yourself for being a sneaky health food genius.

In a blender:
2 Cups Homemade Almond Milk (I'll post my recipe for this later)
Many handfuls of Spinach (sorry I just don't measure things)
A little splash of vanilla extract
Six drops of Stevia (whole foods 365 brand) (I don't like it too Stevia'd, you may prefer more)

BLEND FOREVER, Drive EVERYONE MAD with your blending. No I'm just kidding, but my husband did ask when I would be finishing up with the blender. Probably blended for 10 minutes, but that's because my blender is no Vitamix. Someday Vitamix, you will be mine.

I then strained my concoction because I'm somewhat of a texture freak.

Pour in your designated popsicle holder, I like the stainless steel ones I got from amazon, the only store I seem to frequent these days.

Freeze 'em, eat 'em.