Sunday, December 8, 2013

Chocolate cheesecake - Yeast free, sugar free, lactose free


This is my new favorite recipe and snack! The best part is that it takes under 10 minutes to whip up. I was inspired by a blog post about the things GAPS dieters do wrong. What did I do wrong? Well I don't drink enough broth or eat enough gelatin. So I went searching for ways to include gelatin in my meals and snacks. Then I found this recipe for a crust-less, no bake cheesecake. Here's my sugar free, chocolate it up version:
 Ingredients:
1 Cup Boiling Water
2 Tablespoons Gelatin (get the good stuff, it's worth it)
16 Drops of Stevia
2 Cups SCD Yogurt
1 Paleo Cacoa Bar

Directions: Stir the Gelatin teaspoons into the cup of boiling water, making sure it's fully dissolved and add your stevia.
 I like this kind of gelatin, it's the real deal, grass-fed beef gelatin. Ellie agrees ;)

Dissolved Gelatin


Allow the gelatin-water-stevia mixture to sit for three minutes.

In the meantime, melt that chocolate. I have worked and worked to figure out how to make chocolate or even carob powder make a descent homemade chocolate with stevia. I failed so many time that I've given up. Recently I found this chocolate bar, which is AWESOME!!! Just a warning it takes several weeks to receive your order and their customer service is lacking, but whatever, if you're patient you get the goods.


Now it's time to add the yogurt. I use my homemade SCD yogurt because of it's lack of lactose. If you aren't into this practice already and store bought stuff doesn't put you in bed, you can strain yogurt from the store or buy cream cheese.

This is the consistency of my yogurt.


Use a hand-blender to slowly blend the yogurt into the liquid.  I blend for about five minutes to make it super creamy. Deep bowls are best for this job!


Now add your melted chocolate into the batter. I then add chopped walnuts to the mix.


I put mine in one cup pyrex bowls and top them with a few more chopped walnuts. Put them in the fridge and within a few hours, voila dessert!!


Saturday, December 7, 2013

Coconut-Flax Muffins/Bread: Yeast-free, lactose free, sugar free, gluten free, starch free

This is another one of those recipes that I've worked on for many months to perfect so that it fits my dietary needs. It's always a great roller coaster to ride to do this, but the outcome is always worth the times you looked at your creation and dumped it in the trash. First let me give credit to my inspiration for this recipe. It's a good recipe on its own if you can eat all the ingredients.

The difficulty came when I needed to cut out the egg whites with the yeast free diet. Here's the egg substitution list that helped me conjure my perfect bread.

Bread/Muffin Ingredient List:
Dry Ingredients:
1 Cup Coconut Flour
1 Cup Ground Flax Seeds
2 Teaspoons Baking Soda
1 Pinch of Salt
Seasonings of Choice**

Wet Ingredients:
1/2 cup melted ghee
1/4 cup filtered water
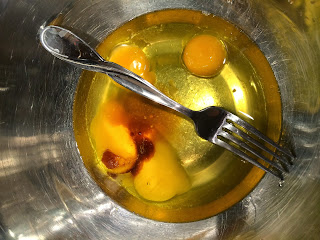
4 Egg YOLKS Only
2 Teaspoons of Apple Cider Vinegar
2 Teaspoons of Vanilla Extract

Not Wet, but not Dry Ingredient:
1.5 cups Homemade Strained Yogurt

Optional: Walnut pieces

  1. Start melting the the butter
  2. Add all of the dry ingredients to a food processor or your equivalent and mix it up!
  3. Add your seasonings
    1. G's Option #1 Sweet: Cinnamon, Nutmeg, Allspice, Cloves
    2. G's Option #2 Savory: Parsley, Oregano, Garlic Powder
    3.  Turn your oven on to 350 degree
    4. In a separate bowl mix together:
      1. Water, Egg Yolks, Water, ACV, Vanilla Extract
        1. If you are going for sweet 6-16 drops of Stevia Extract (365 Whole Foods Brand)
        2. REMEMBER: If your butter is TOO hot it can cook the eggs!
    5. In the dry food processor, add the yogurt and blend.
      1. My yogurt is homemade and I strain it for several days with a cheescloth so it has a cream cheese texture. It may affect your recipe if you use a thin, watery yogurt. So either make your own SCD yogurt and strain for a couple of days, or buy yogurt from the grocery store and strain it through a cheescloth until you get the appropriate form of the yogurt. 
        Homemade Yogurt Texture
    6. Turn on the food processor and slowly add wet ingredients
      Mixed Ingredients
    7. Blend until smooth texture is acquired
    8. Optionally add your nuts in and pulse!
    9. Here's where you can decide between muffins and bread!
For muffins:
I use paper cups because I don't like to hassle with trying to pop a muffin out of a place its securely fastened to and make a mess and a sad looking muffin.
- I can usually do this directly after blending, but when my yogurt has been more watery I wait a little bit for the butter to harden a bit, this makes them easier to mold into balls.
- Mold the dough into ball and put them in the cups, then flatten the top out with your hand.
This is important for a gluten free/starch free muffin, because otherwise it looks unattractive on the top of the muffin, as well as unevenly cooked
- Cook for 20 minutes on 350 degrees

For Bread:
- I use parchment paper, because, again I dislike failure in the baking department.
- I use a 9 x 13 glass pyrex container.
- Bake for 40 minutes at 350 degrees.